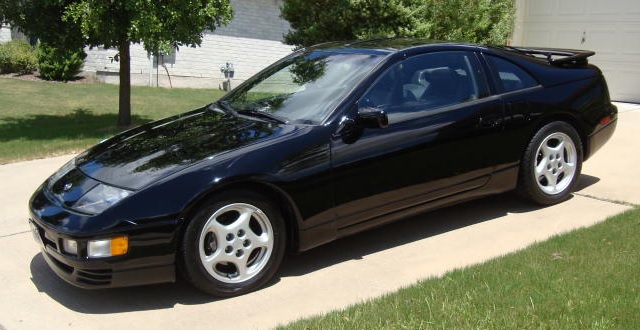
Refreshing a 1996 Nissan 300zx Twin Turbo
Engine removal and other stuff | Engine disassembly
I am documenting every step of the engine disassembly with notes and photographs.
This will be a small subsection of that documention, just showing some highlights along the way.
The first major step was removing the intake plenum from the top of the engine. This took 25 steps in my book.
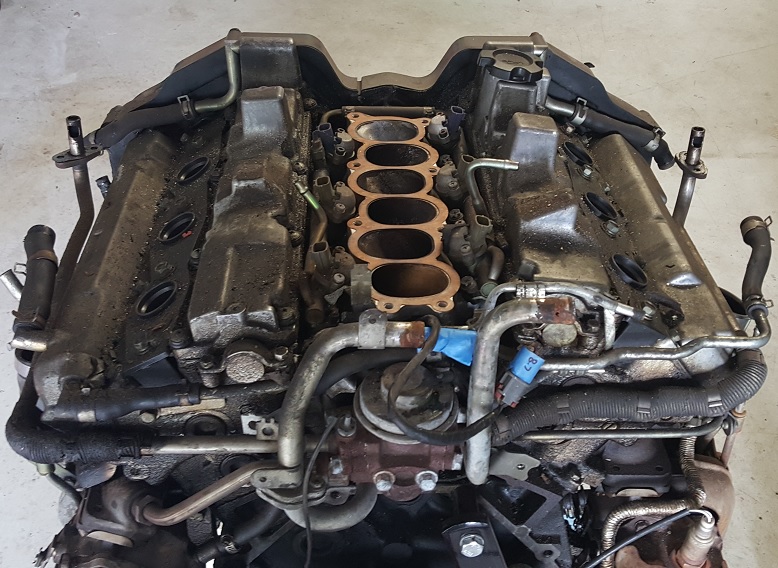
Here's a picture of the engine without the intake plenum:
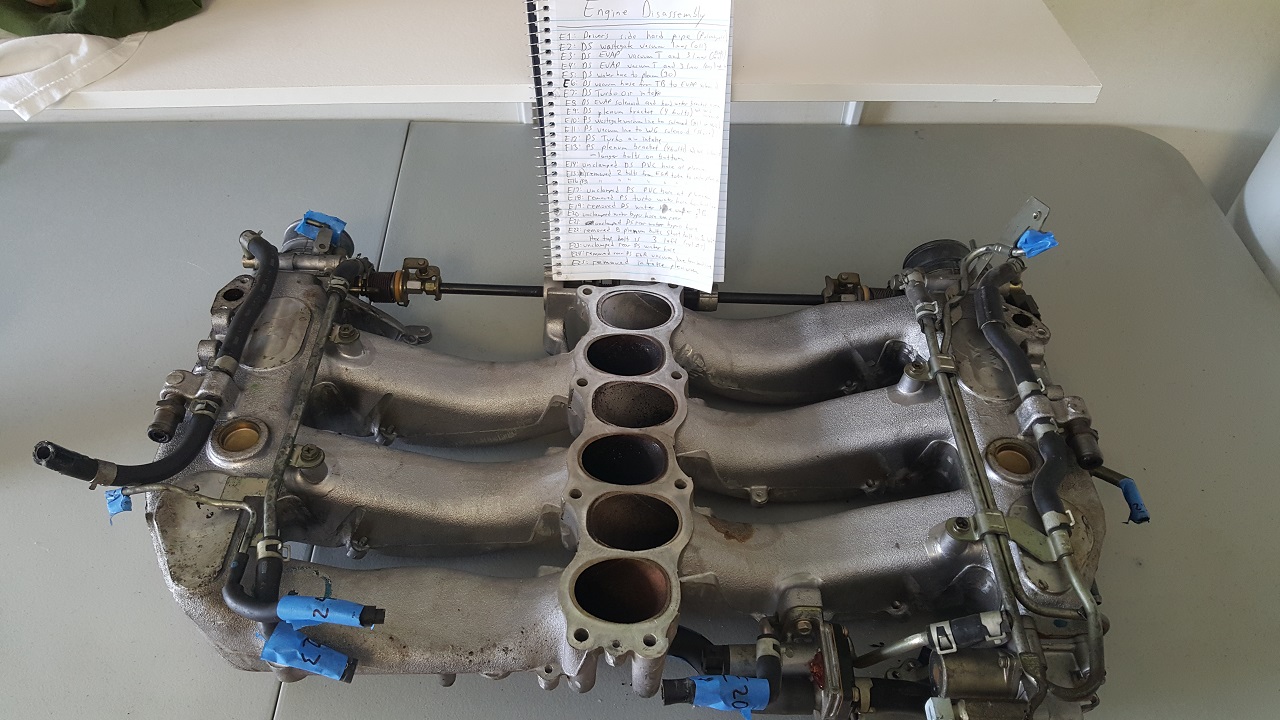
Here is the intake plenum, upside down, which shows all of the water hoses routed under it which will all be removed, along with my notebook:
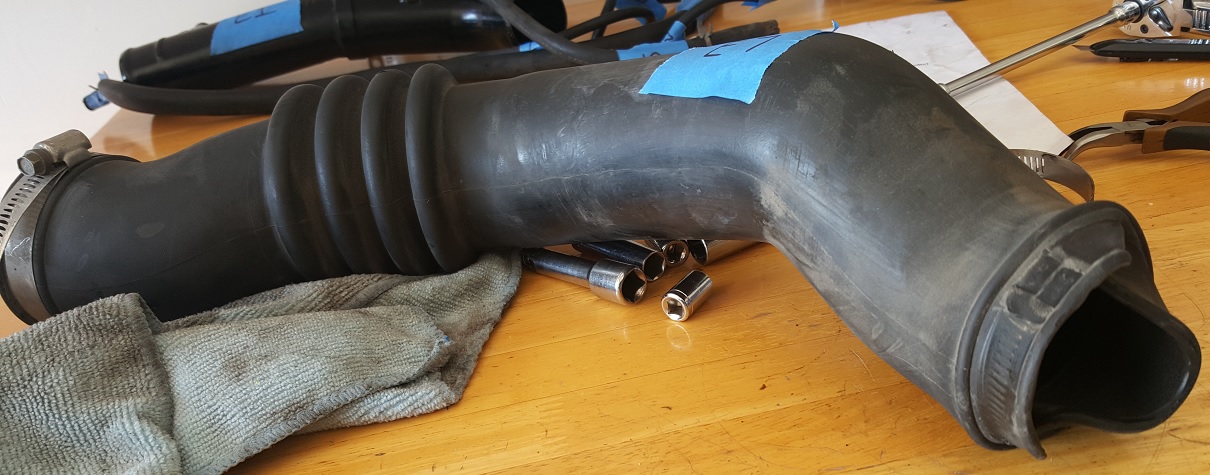
This is one of the air inlet hoses. You can see the right end wasn't even properly fitted around the pipe it was connected to.
This shows the underside of the intake plenum with all of the extraneous hoses and lines removed:

This is the top of the intake plenum with the throttle body assemblies removed:

Here is the intake plenum after an initial cleaning, already looking much better:

Here is the underside after the initial cleaning:

November 7, 2015
Today's tasks consisted of removing the power steering mount, rear lower water pipe, rear upper water pipe, EGR system, precats, AC tree, and driver side turbocharger.
Before I began, I shined a light in the PCV hoses, and I discovered the restrictor on the driver side plenum PCV hose was turned 90 degrees, making it ineffective.
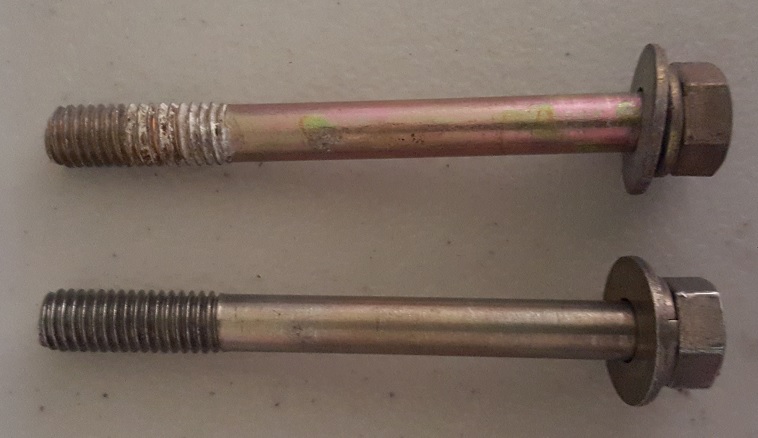
I've been cleaning all of the parts as I remove them. Here are some before/after examples of bolts:

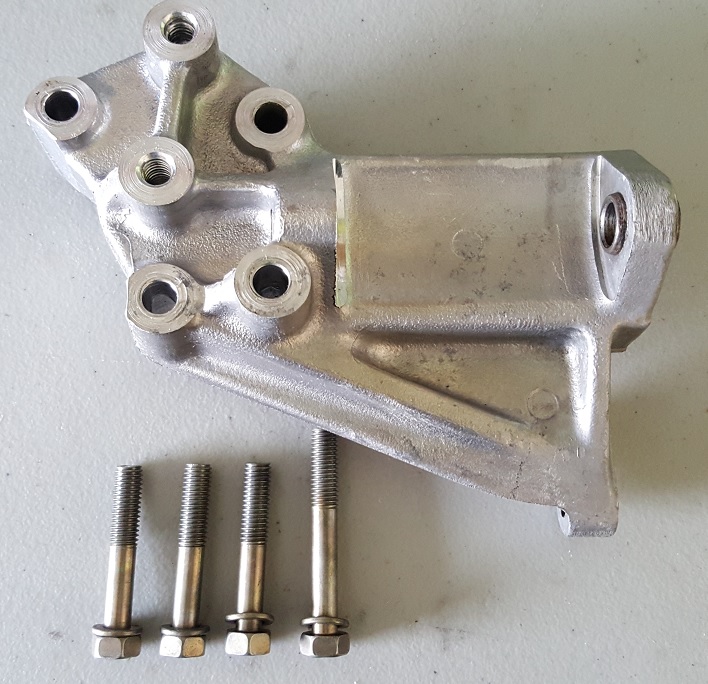
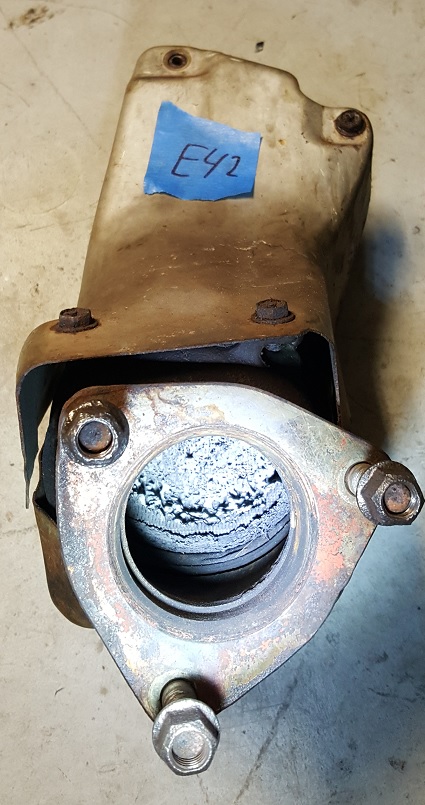
This is the power steering mount:
These are the two rear water pipes. The smaller one has been cleaned up and looks good. The larger one on the other hand...
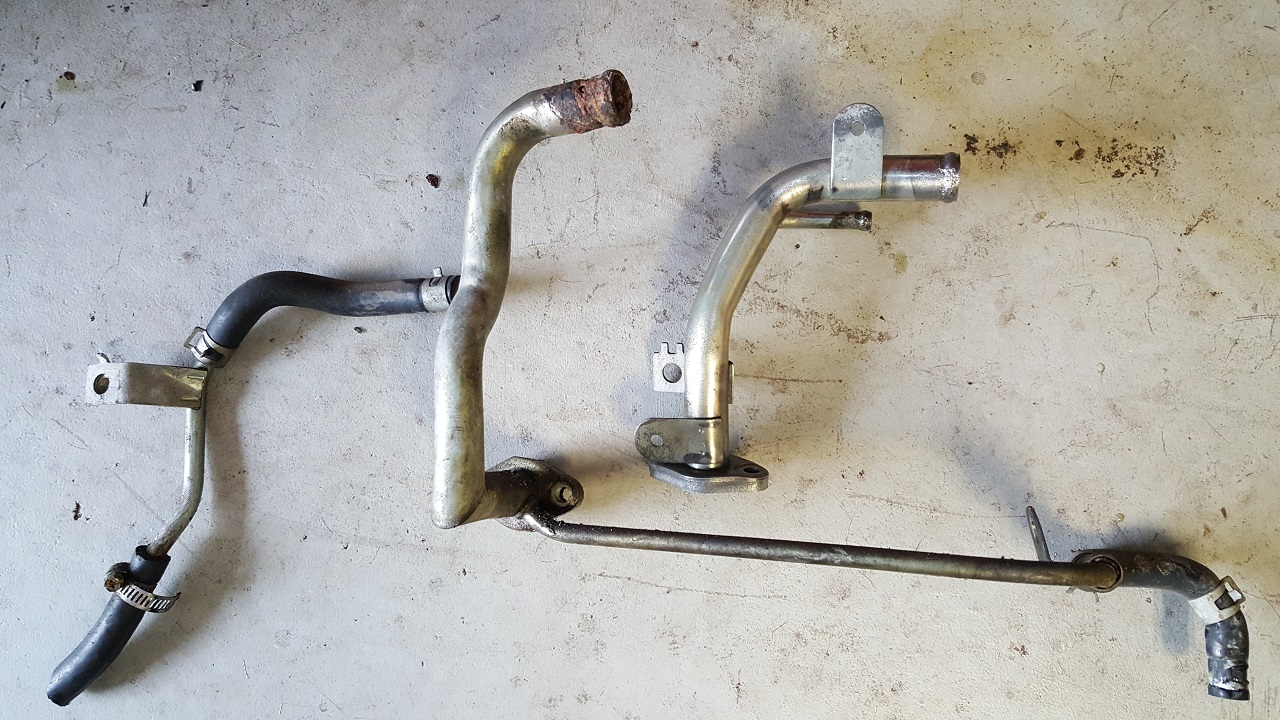
Here is a close-up of the bad water pipe. I'll need to replace this one.
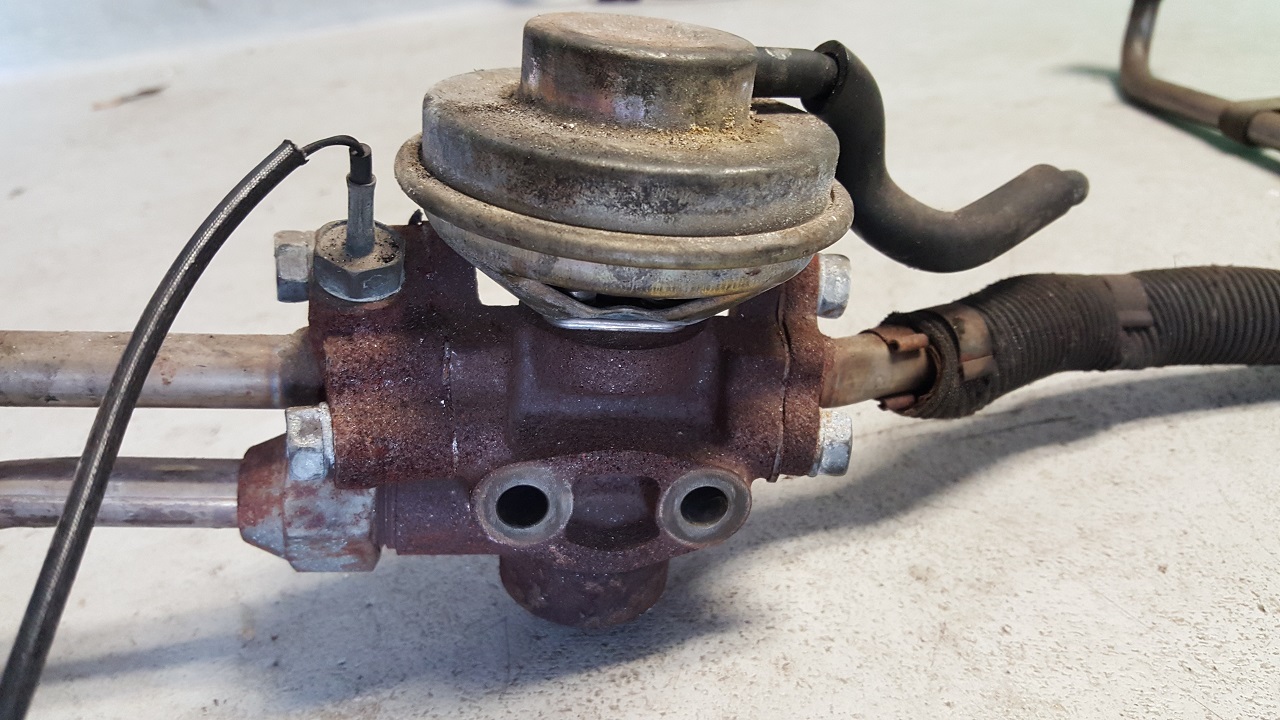
Here is the complete EGR system:

Here is a close-up of the EGR valve. I cleaned up all of the hard lines, but I'm getting a new EGR valve.
These are the precats:
The passenger side precat looks ok:
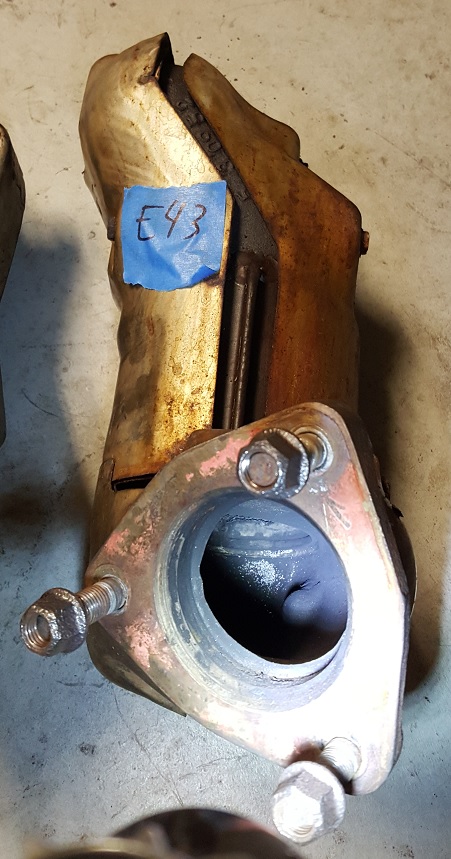
But the driver side precat looks like the internals have been destroyed:
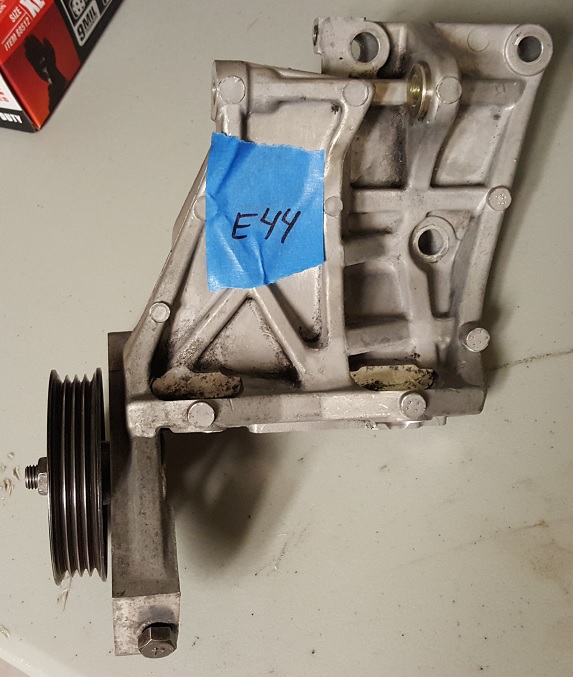
This is the AC tree:
And here is the driver side turbocharger:

November 8, 2015
I spent the afternoon removing the passenger side turbocharger, motor mounts, upper and lower front water pipes, all 3 timing belt covers, the crank angle sensor and the crankshaft pulley.
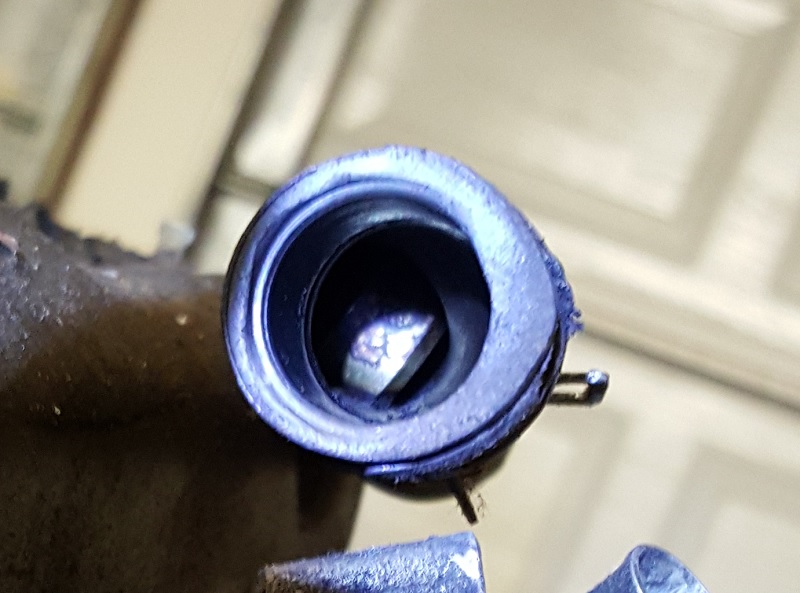
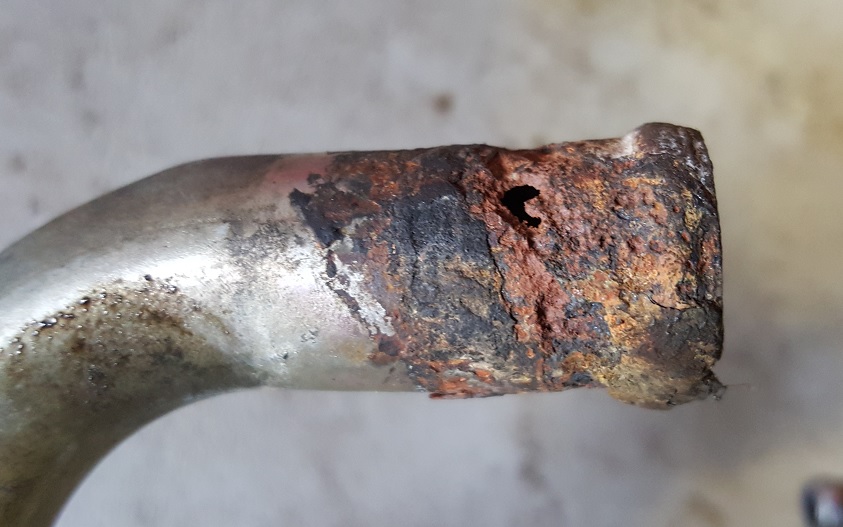
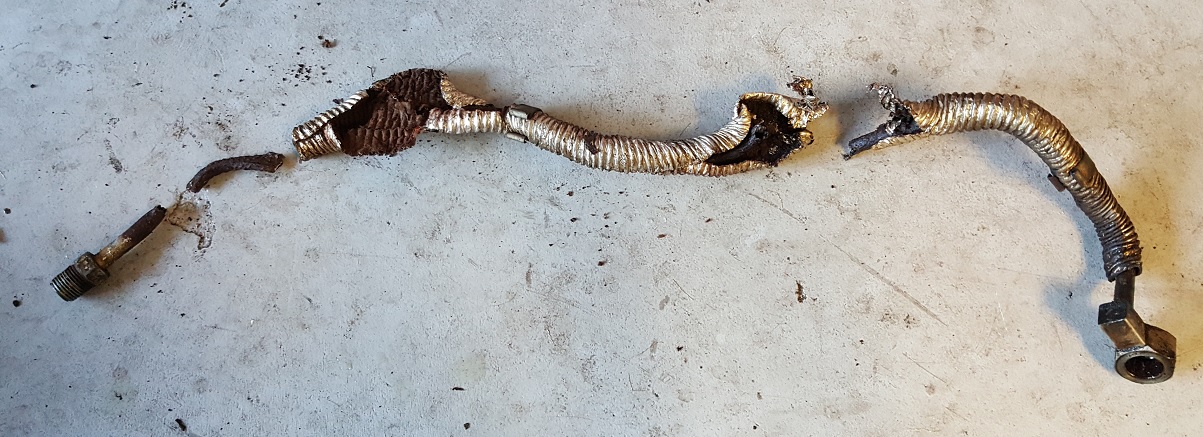
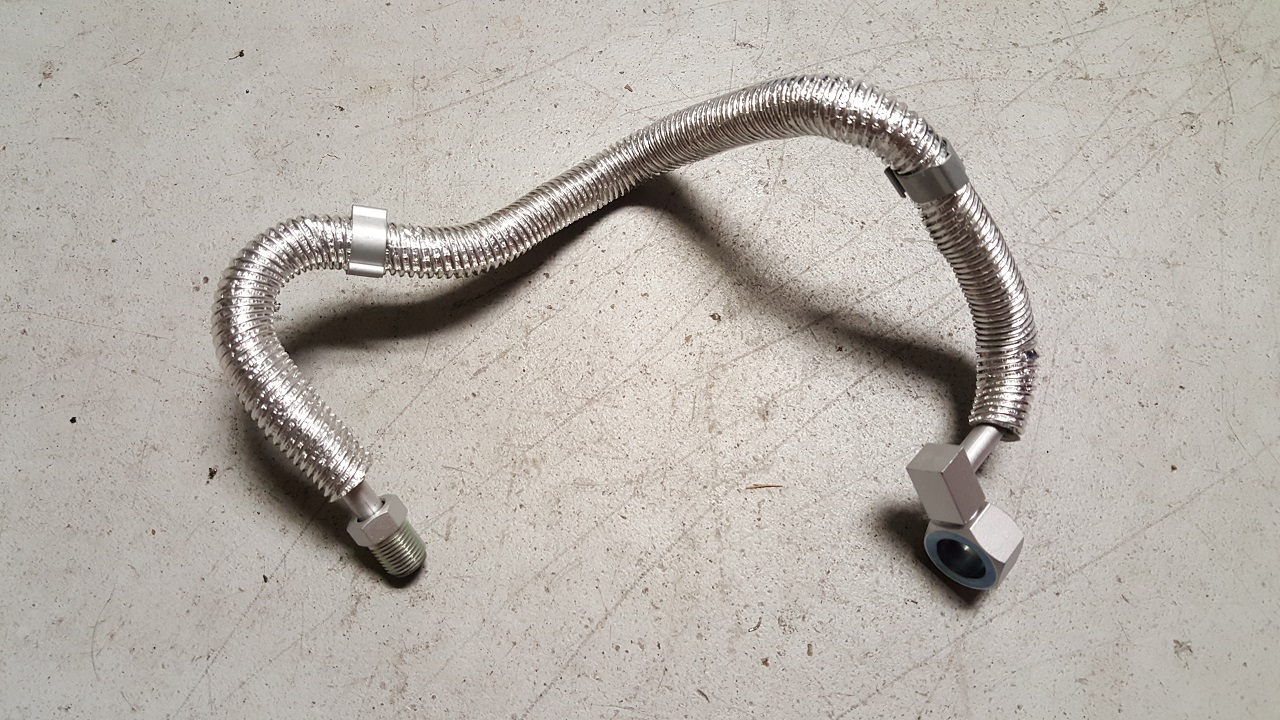
When removing the passenger side turbo, I discovered the condition of the oil inlet line to the turbo had rusted away inside the protective covering.
Not good. No wonder there was so much oil all over the passenger side of the engine.
In general today's tasks went pretty smoothly, except most of the timing cover bolts were so rusted and gross they were difficult to remove.
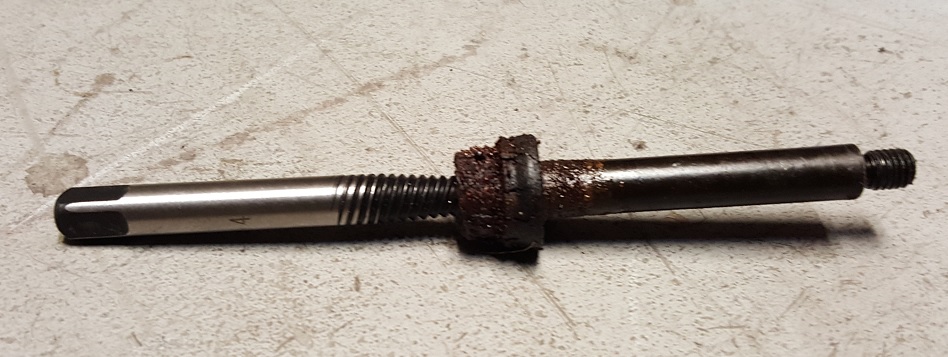
The very last one I tried to remove required being extracted:
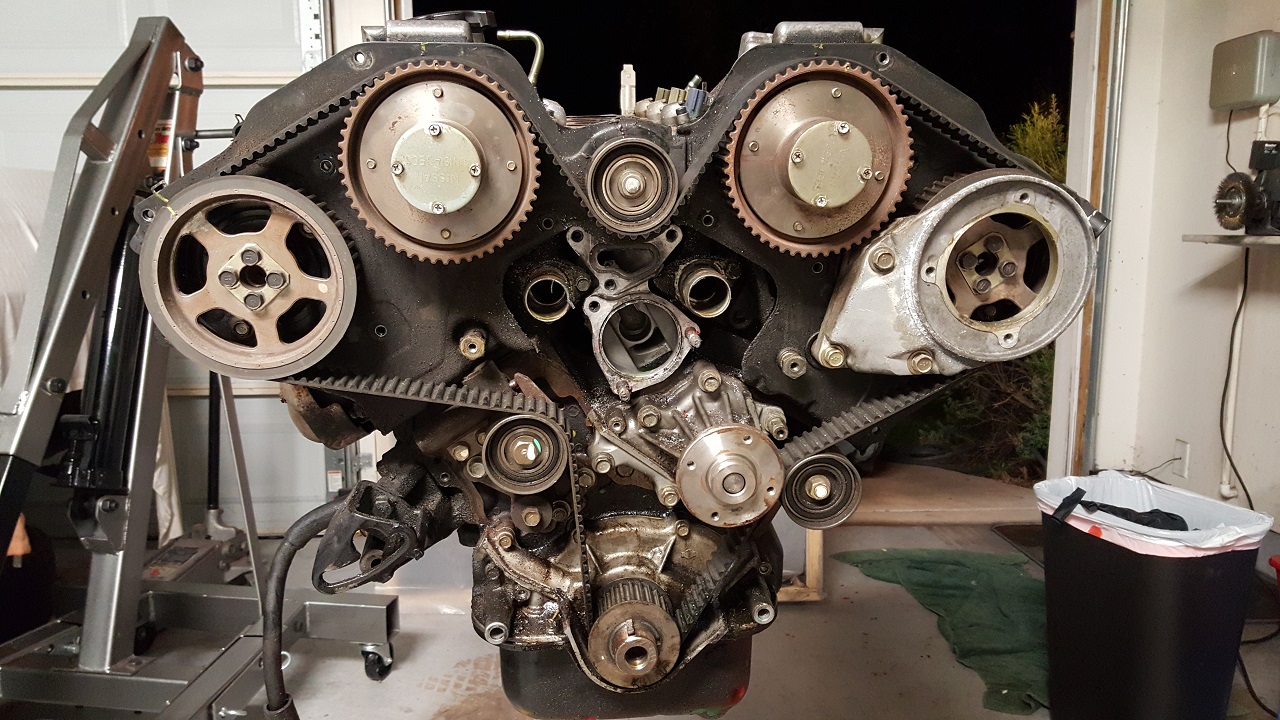
Here's the engine with all the timing covers off:
I used a steering wheel puller to get the crankshaft pulley off. As I was slowly pulling it off, I kept telling myself "don't drop it, don't drop, don't drop it."
I dropped it. It broke in one place:
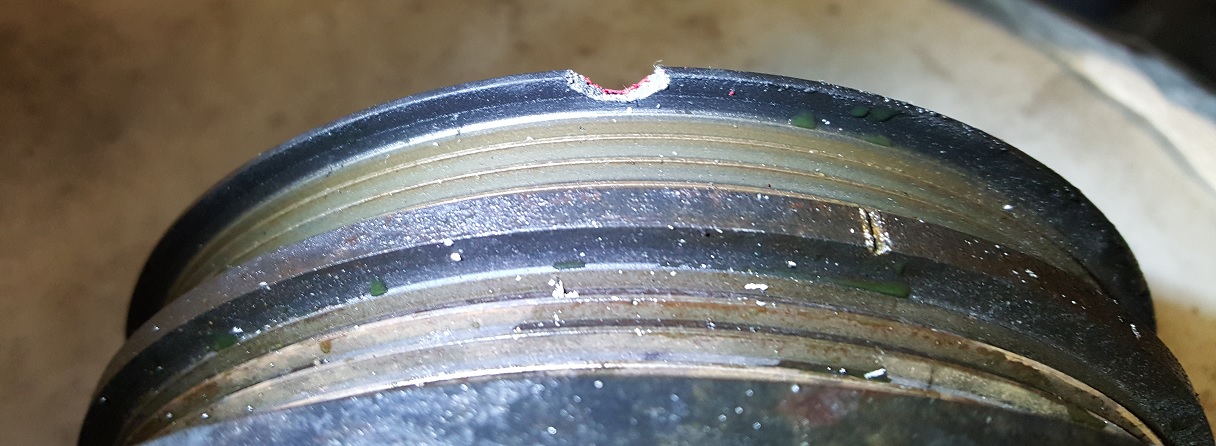
And it bent in another:
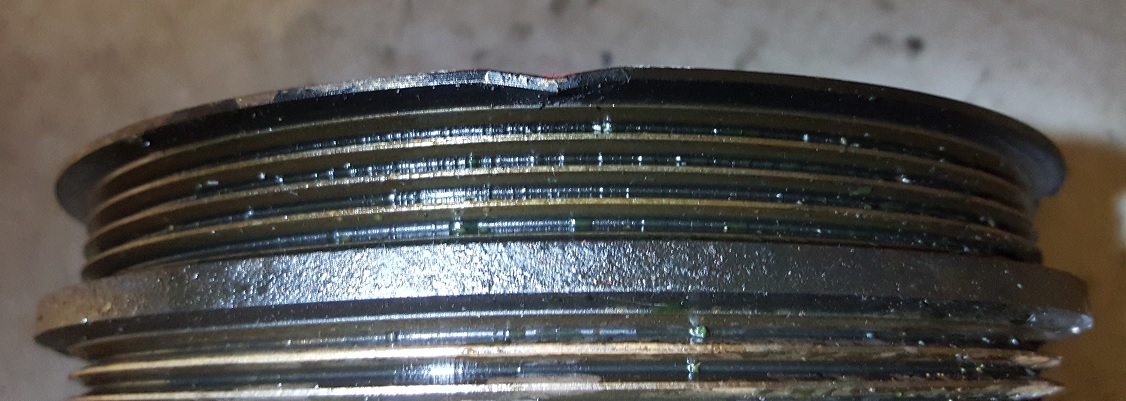
So now I may have to replace that.
November 13, 2015
I spent a little time tonight removing the water pump, auto-tensioner, timing belt, intake and exhaust cam sprockets, idler pulleys and timing belt backing plates.
I stopped at the crankshaft timing sprocket. I've had it soaking in PB Blaster, and I'll attack that in the morning and continue from there.
Here is where it stands now:
November 14, 2015
I spent a good part of the day finishing the top end disassembly, including all of the following:
- crankshaft pulley
- front water pipes
- fuel rail
- coil pack guides
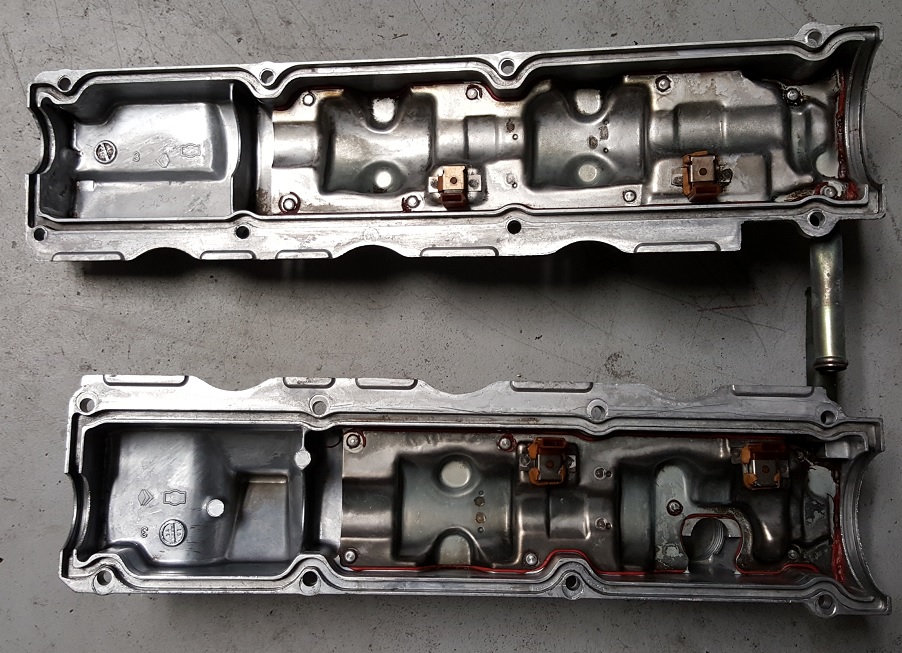
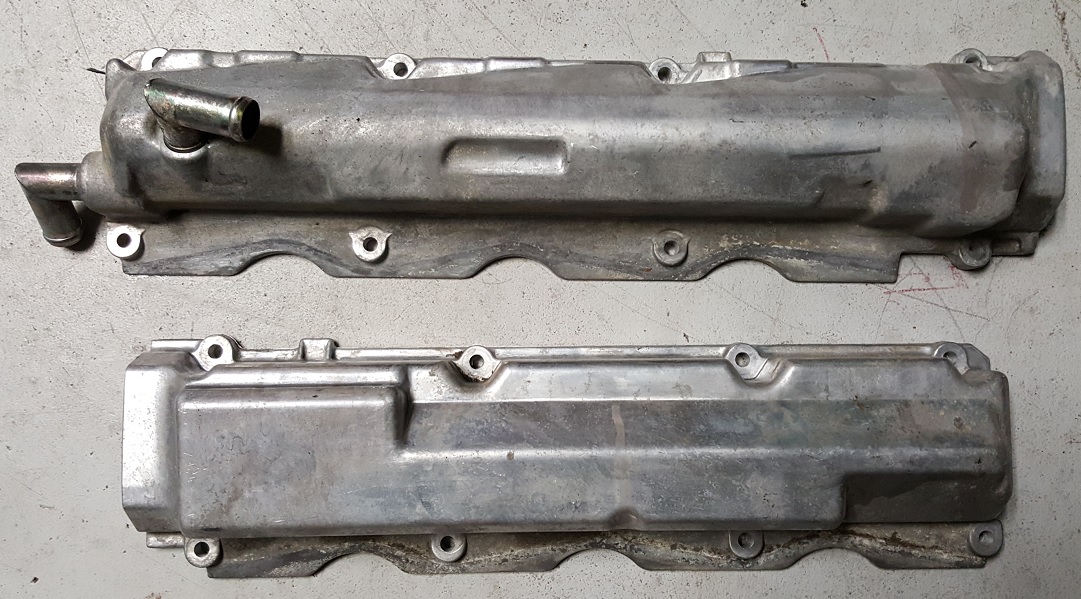
- exhaust valve covers
- intake valve covers
- camshafts
- lifters
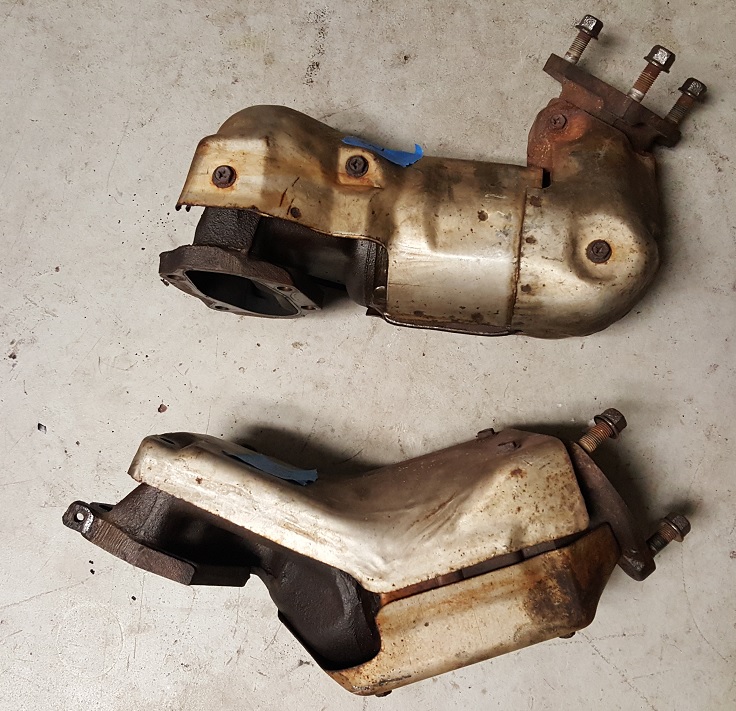
- exhaust manifolds and heat shields
- alternator bracket
- oil filter tree
- idler pulley studs
- lower intake
- cylinder heads
- thermostat housing and upper water pipe
- detonation sensor
I was worried about the crankshaft pulley removal. I kept reading horror stories of it rusted onto the crankshaft, but mine came of with very little effort. Whew.
Here is the engine without the camshafts:
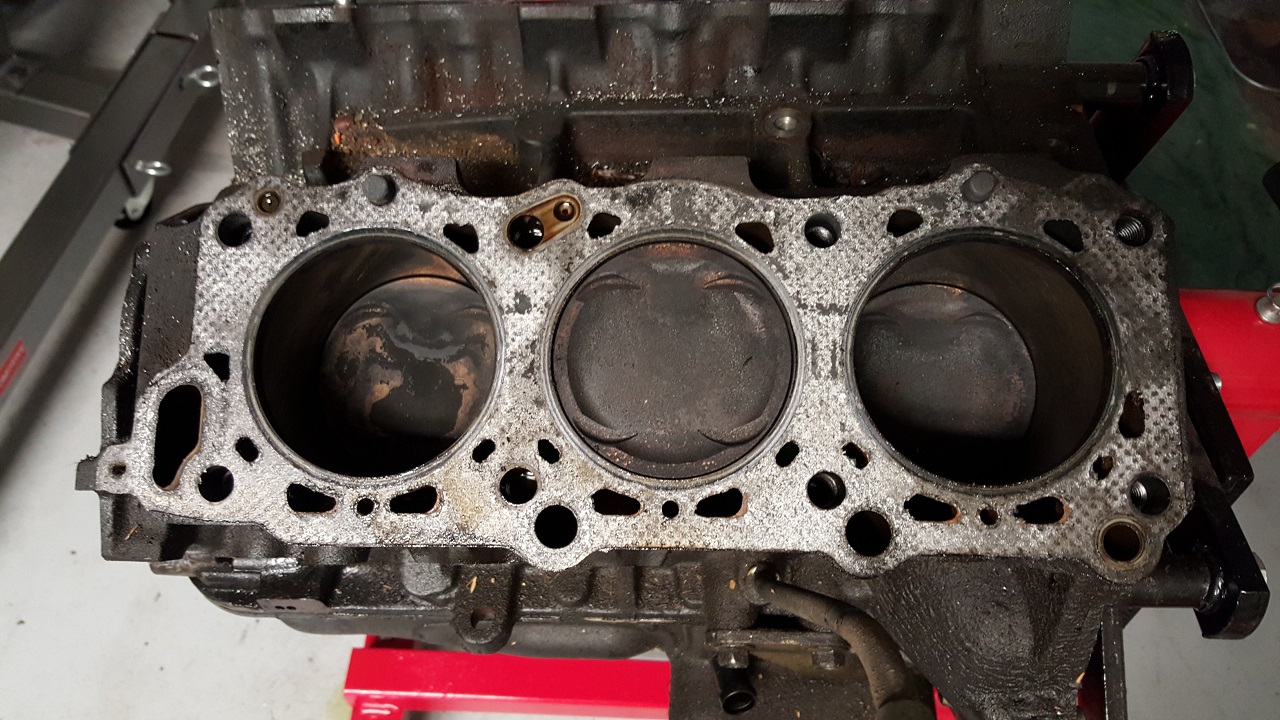
Here is the engine with the driver side cylinder head removed:
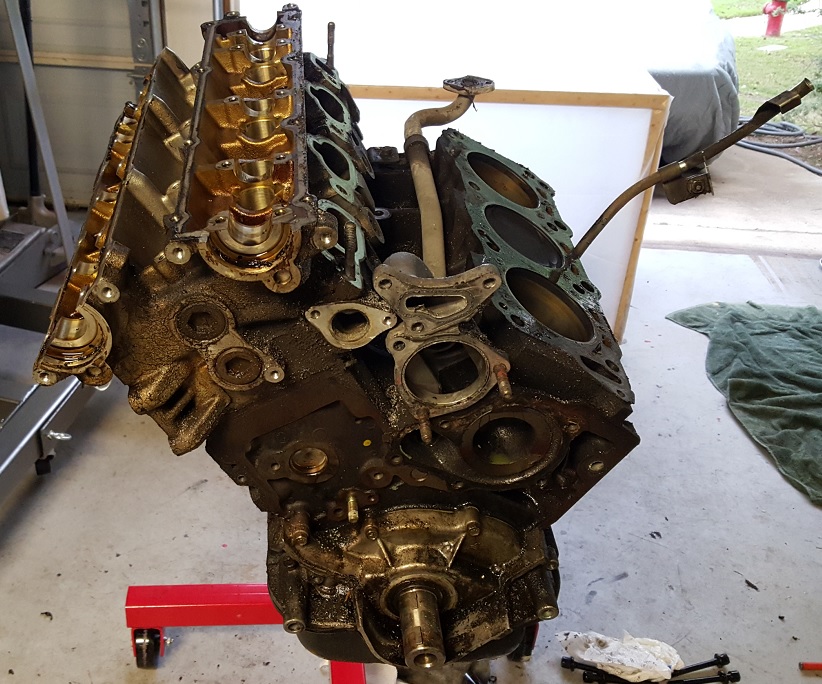
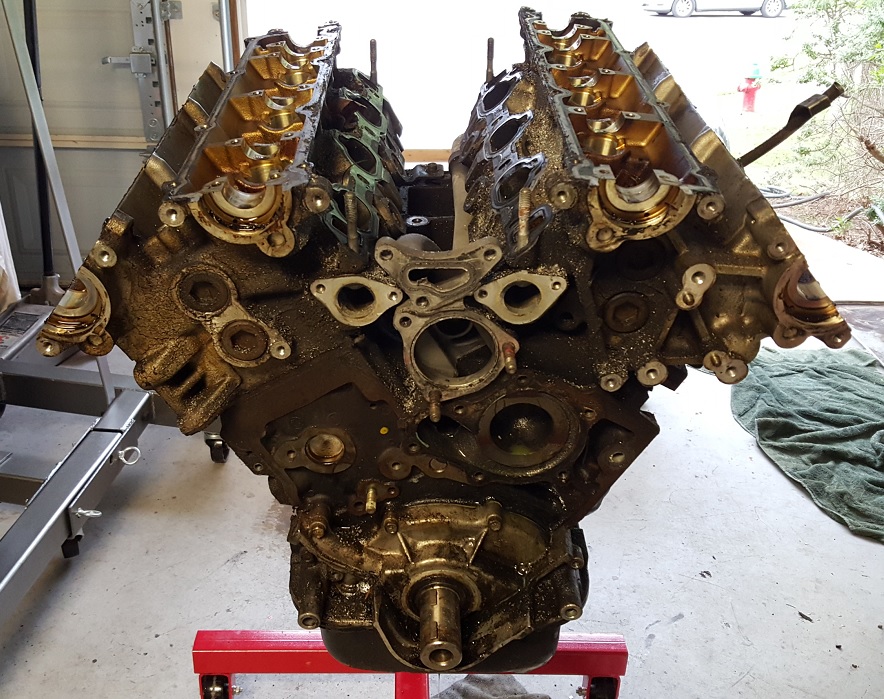
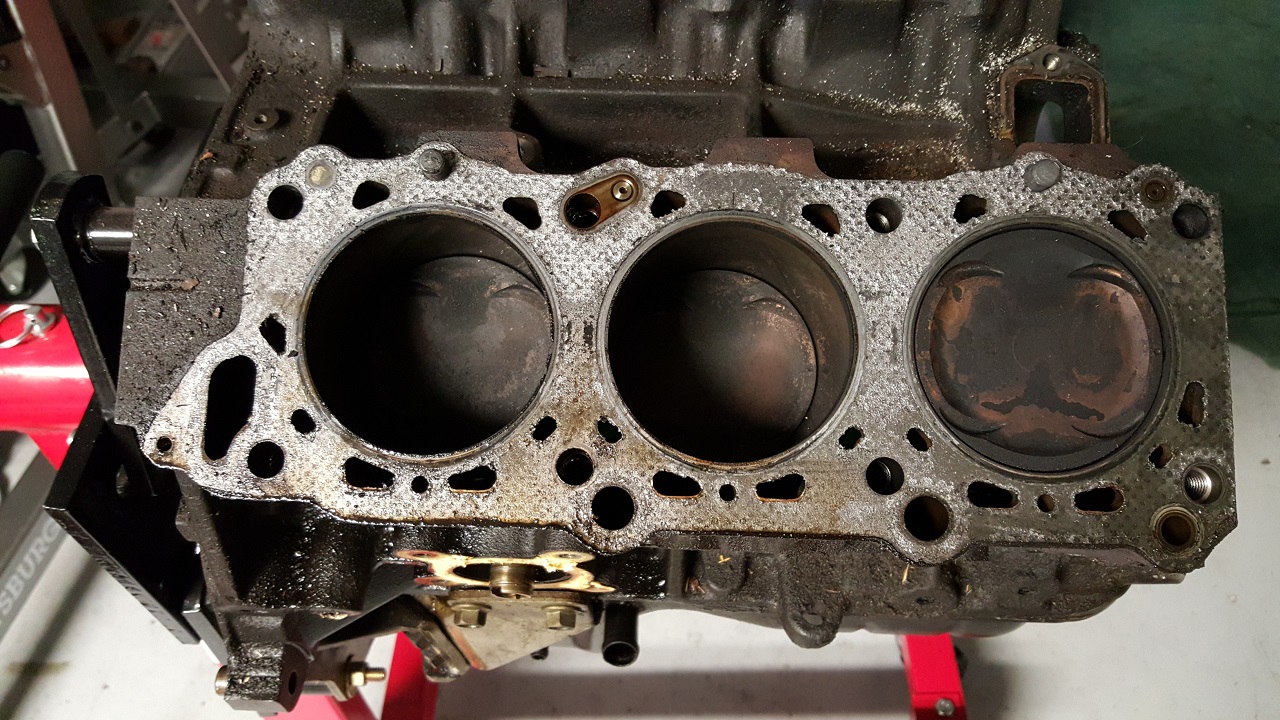
Here is the engine with both cylinder heads removed:
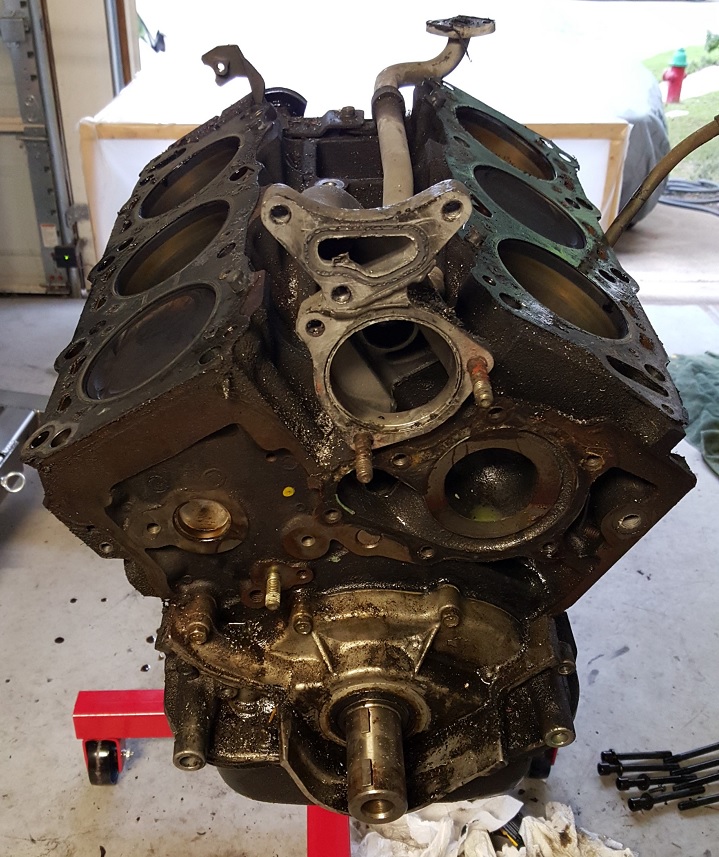
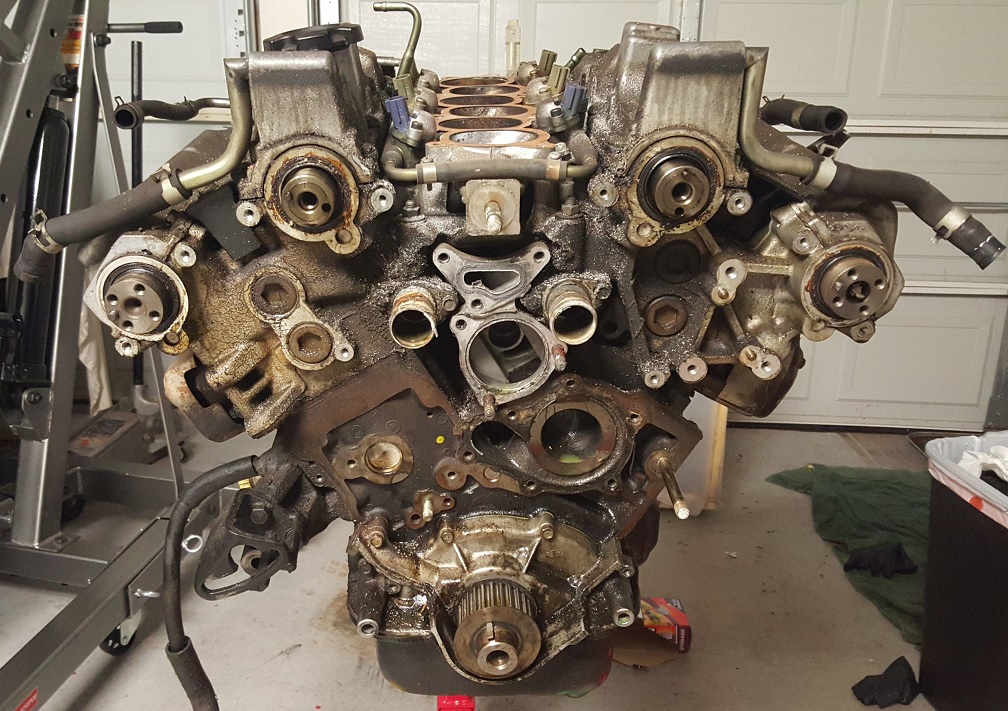
Here is the engine with all top-end components removed:
Here is a look at the driver side of the engine:
Here is a look at the passenger side of the engine:
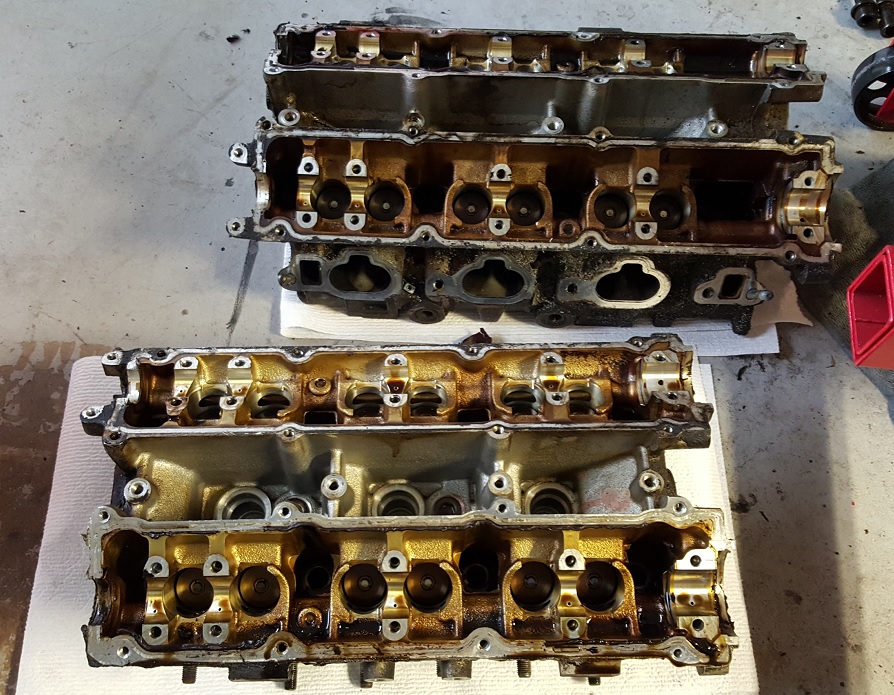
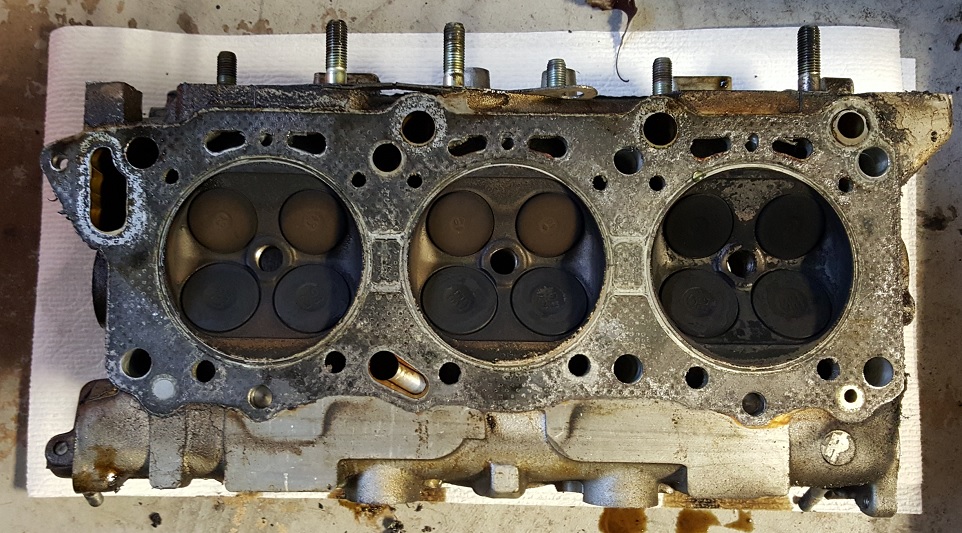
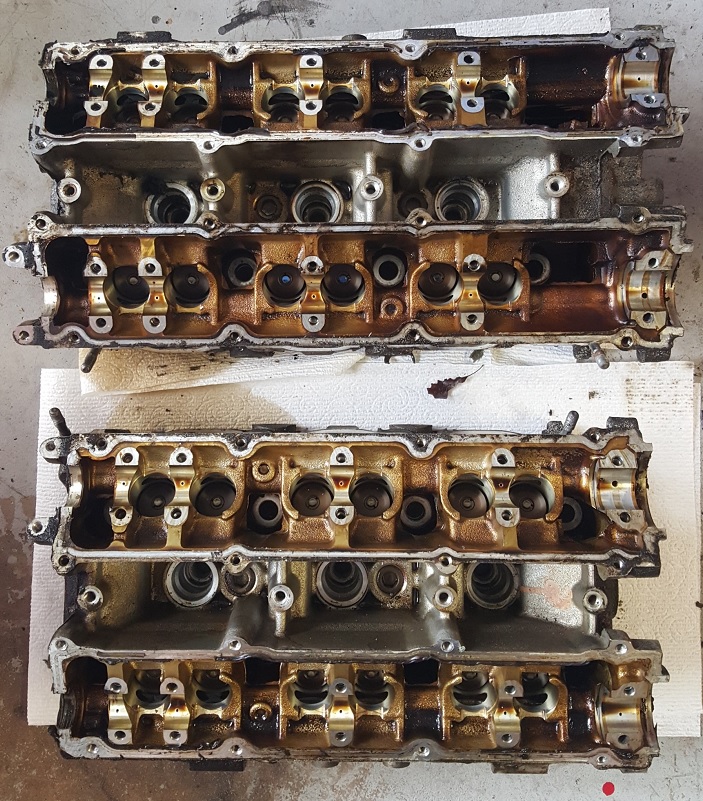
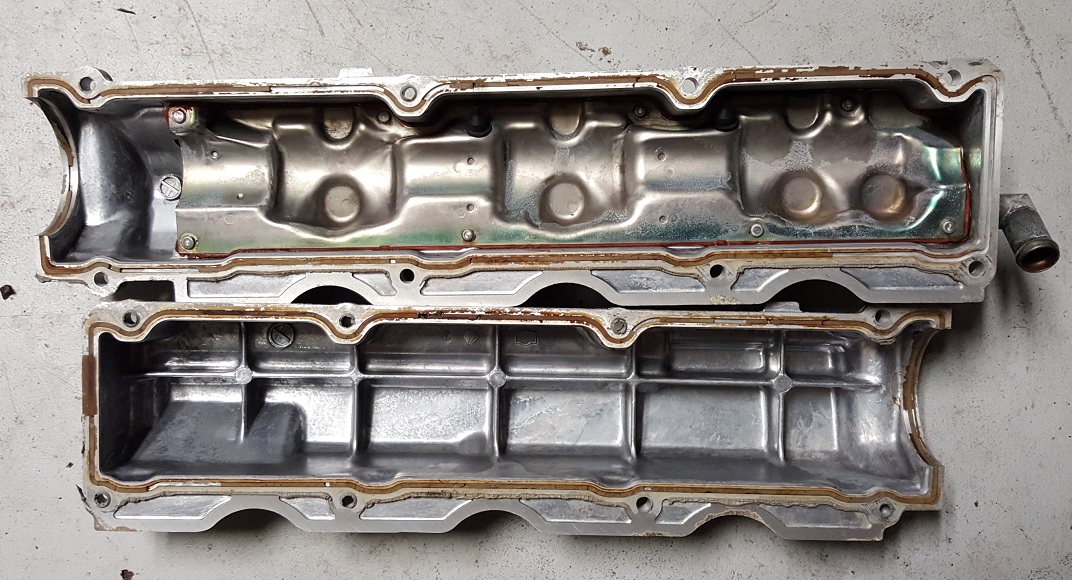
Here are the cylinder heads:
This is the underside of the driver side cylinder head:
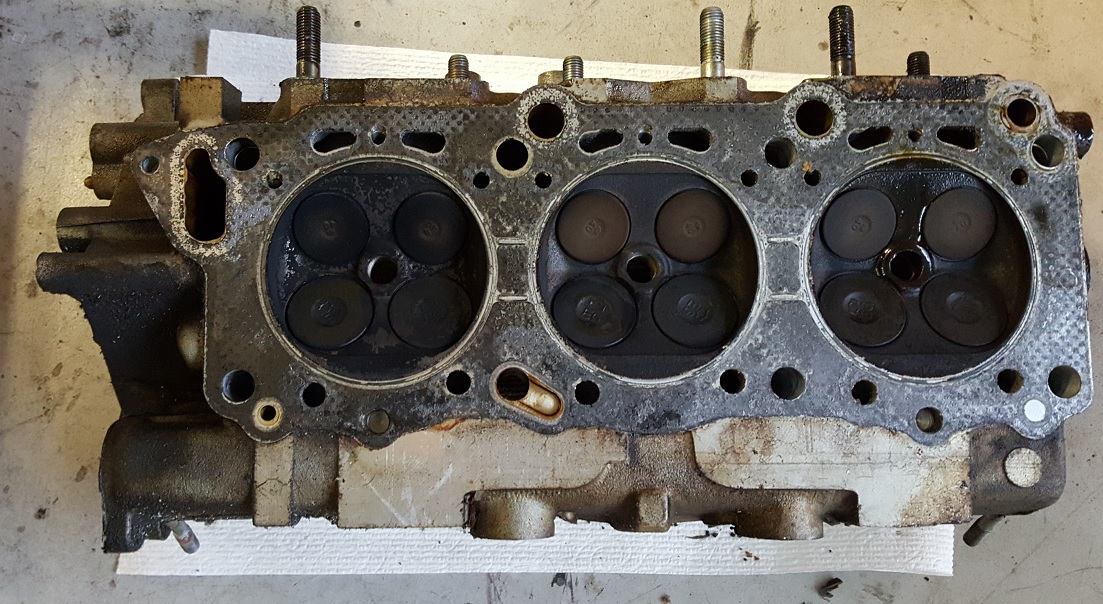
This is the underside of the passenger side cylinder head:
I have't cleaned anything I removed today yet, so tomorrow will likely be spent just cleaning and inspecting parts. Then comes the bottom end disassembly.
November 17, 2015
I continued cleaning all of the nuts, bolts and parts I removed a few days ago.
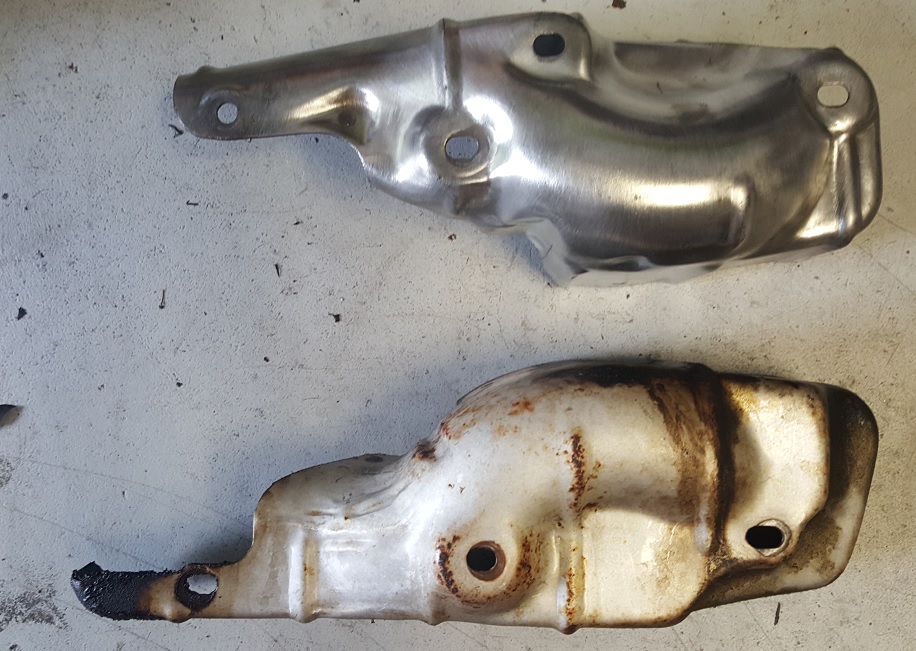
Here's a good example of how nicely some things clean up. These are the exhaust manifold heat shields, one clean and one not:
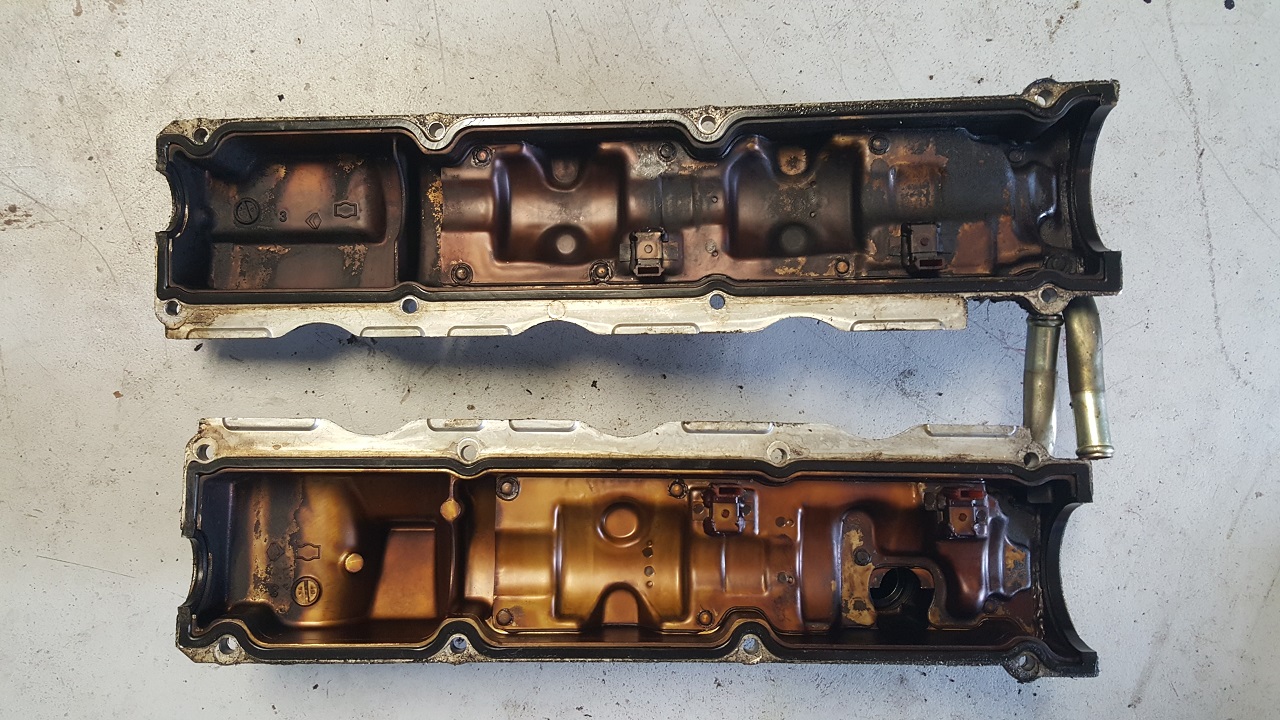
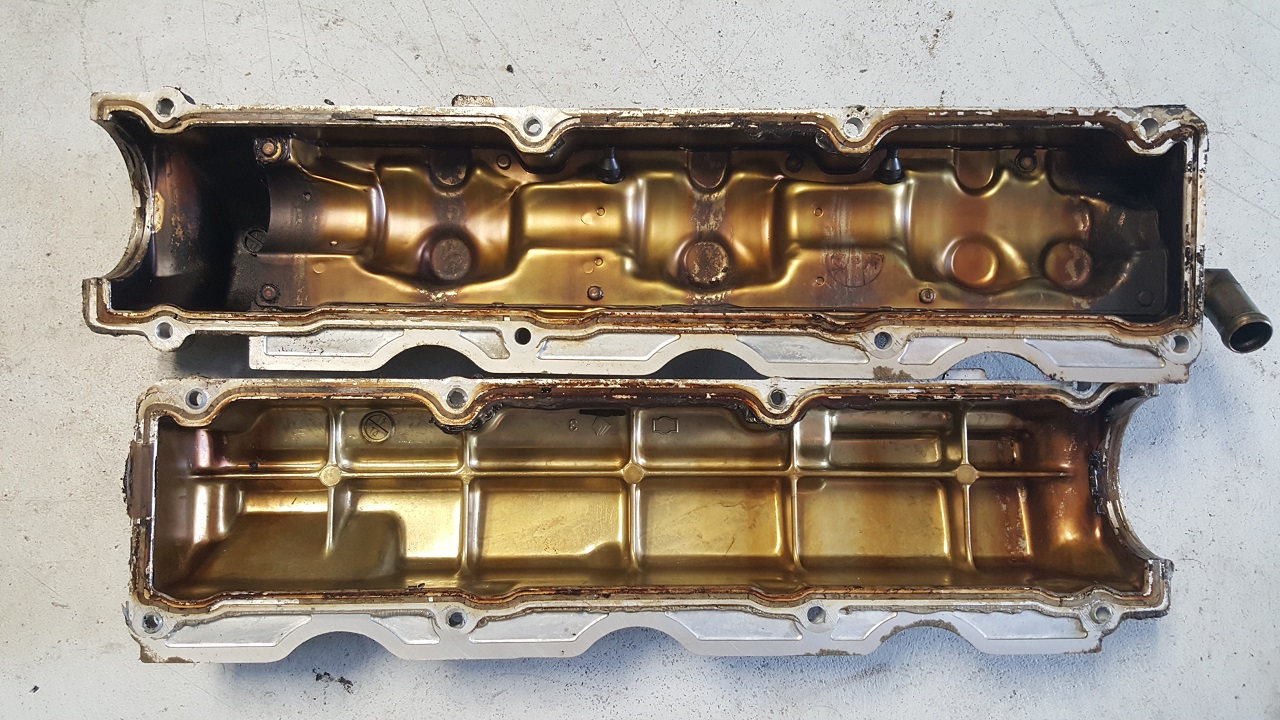
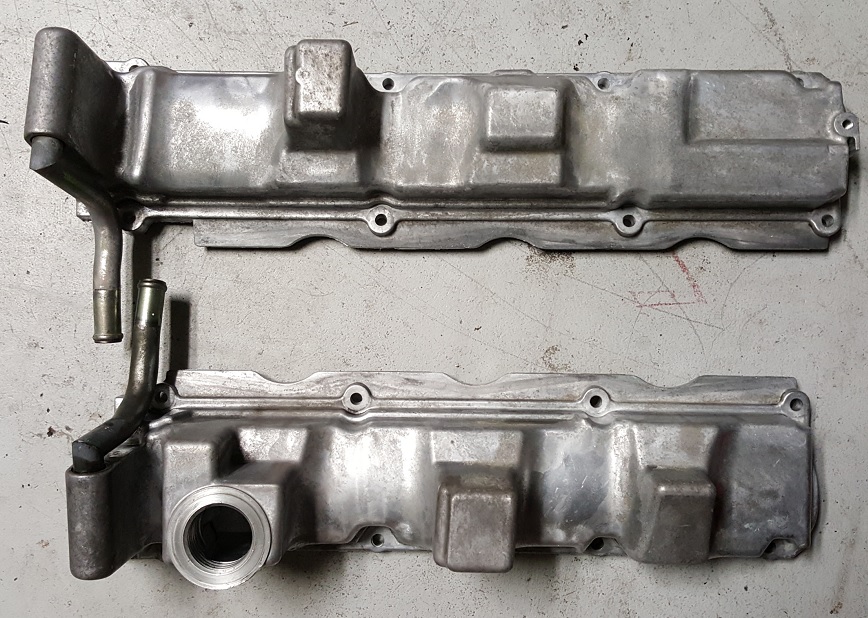
The following pictures are in the insides of the intake and exhaust valve covers plus the two cylinder heads.
The driver side of each is the top item in each picture. You can see clear evidence that the driver side of the engine endured higher heat levels than
the passenger side. The car never overheated though, so hopefully there is no damage from the excess heat.
The new passenger side turbo oil inlet line arrived today. As a reminder, here is what it looked like:
Here's what the new one looks like:
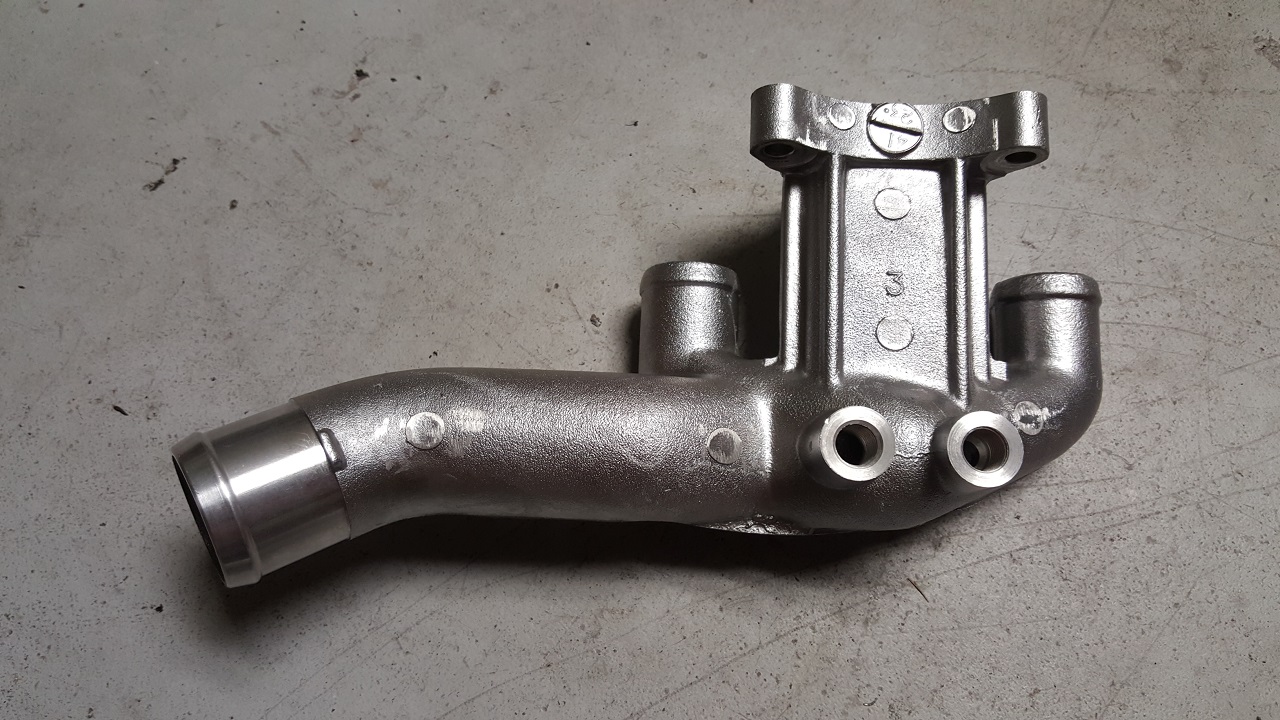
I also got a new upper water pipe. The original has holes around the neck.
November 20, 2015
I cleaned more top end engine parts tonight. I've had the intake and exhaust valve covers soaking in my parts washer.
So far I just did a little scrubbing when I took them out tonight, and they're looking much better already.
I still need to clean gasket surfaces and do a little polishing on them. I have't decided if I'm going to leave them as is or paint them yet.
November 27, 2015
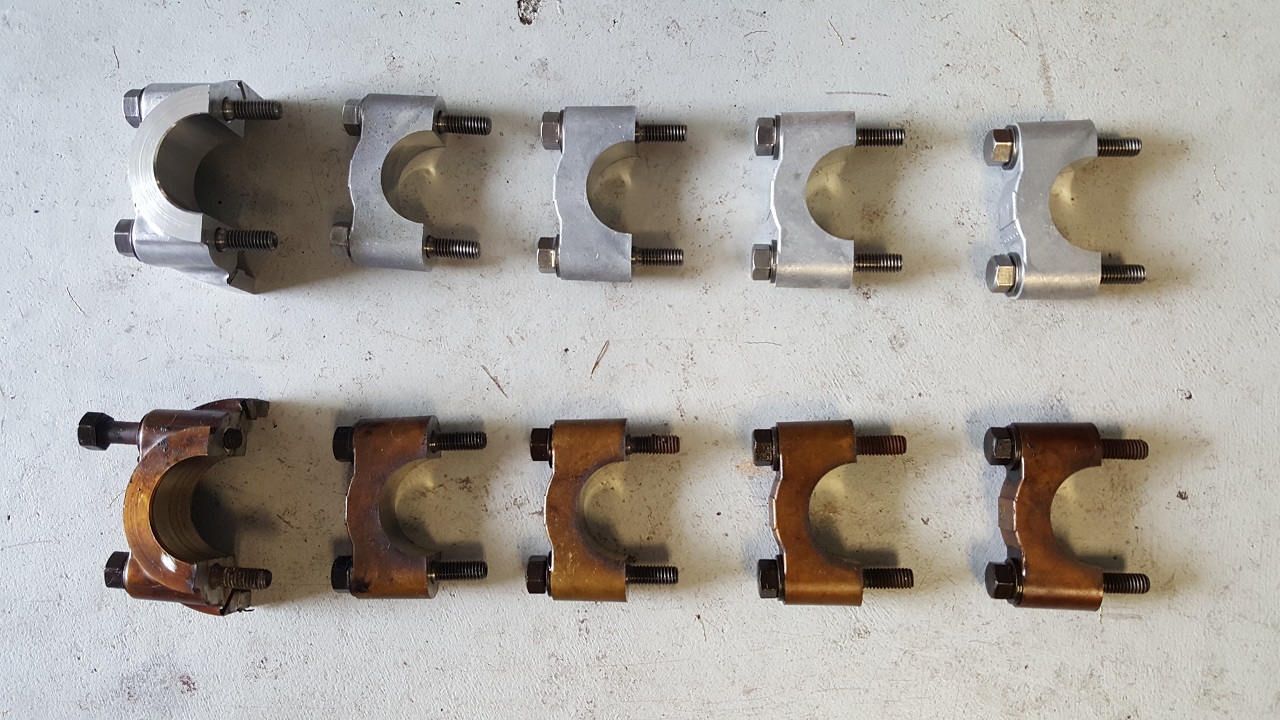
The only thing I've done today was to start cleaning the cam journal caps and bolts. Here's a good before/after comparison:
January 3, 2016
This is a summary of the things I've done over the past month when I've had time.
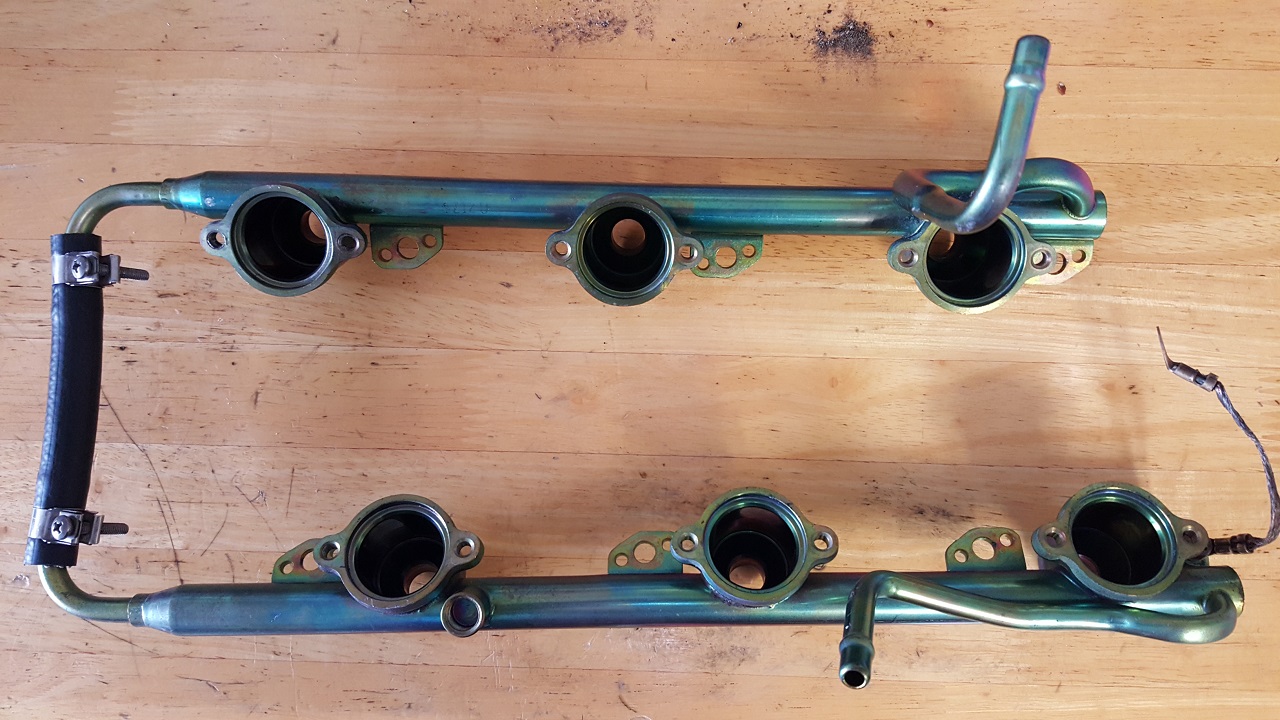
Here is the fuel rail as it came out of the engine:

Here is the fuel rail after cleaning and replacing the fuel line:
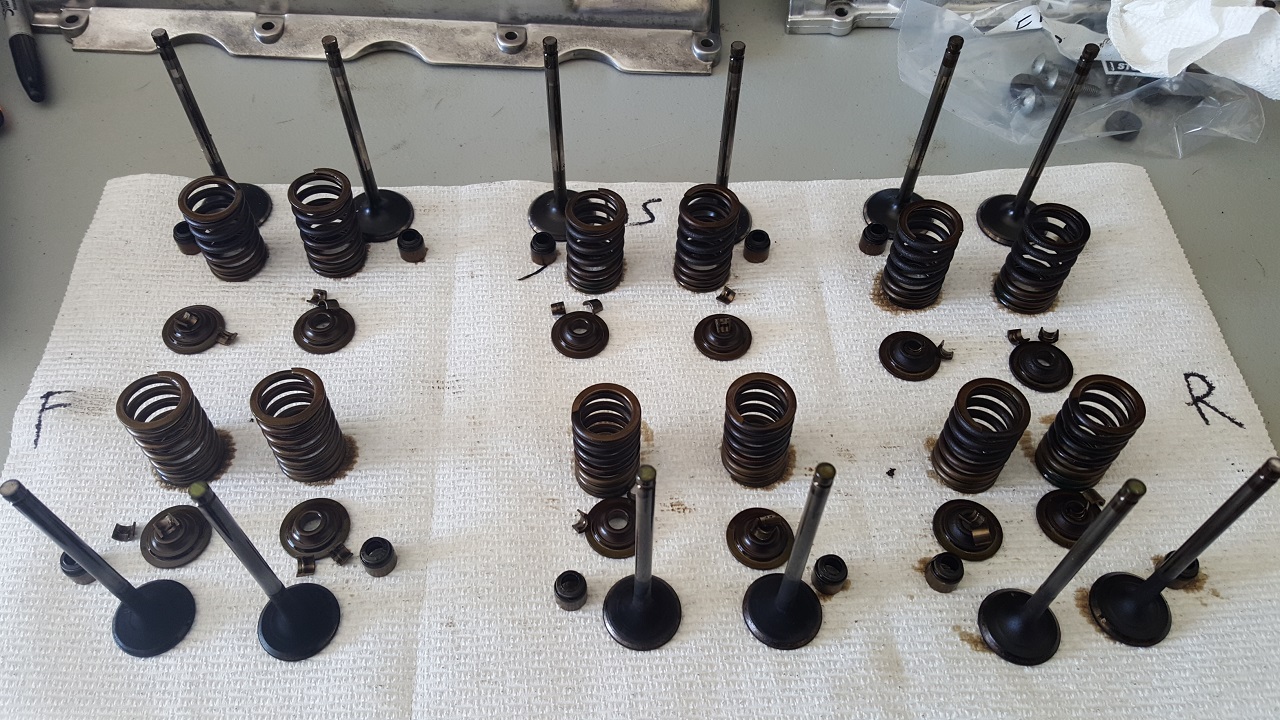
I disassembled the heads using a Blue-Point GA317, which was awesome to use. Here are the valves, springs, keepers and retainers from the driver side head:
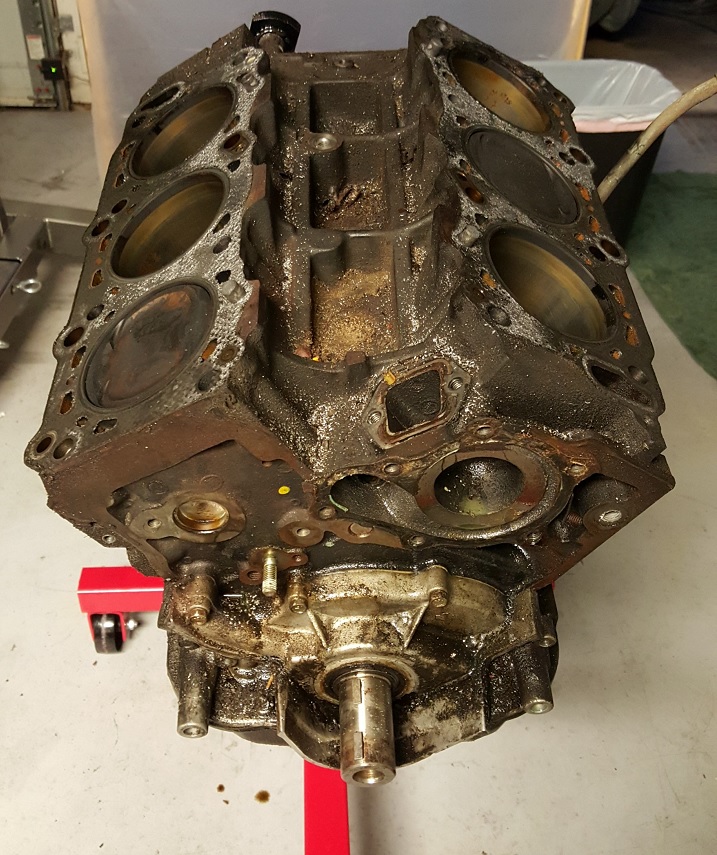
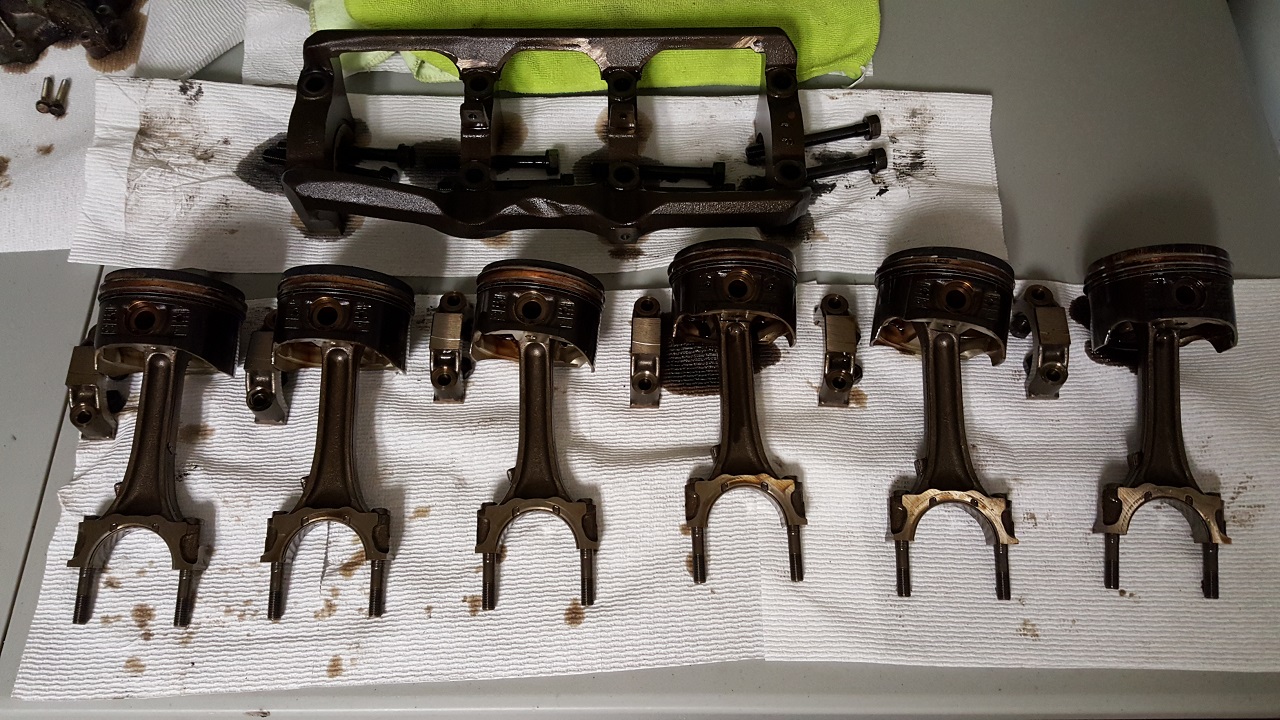
I finally flipped the engine over and removed the oil pan:
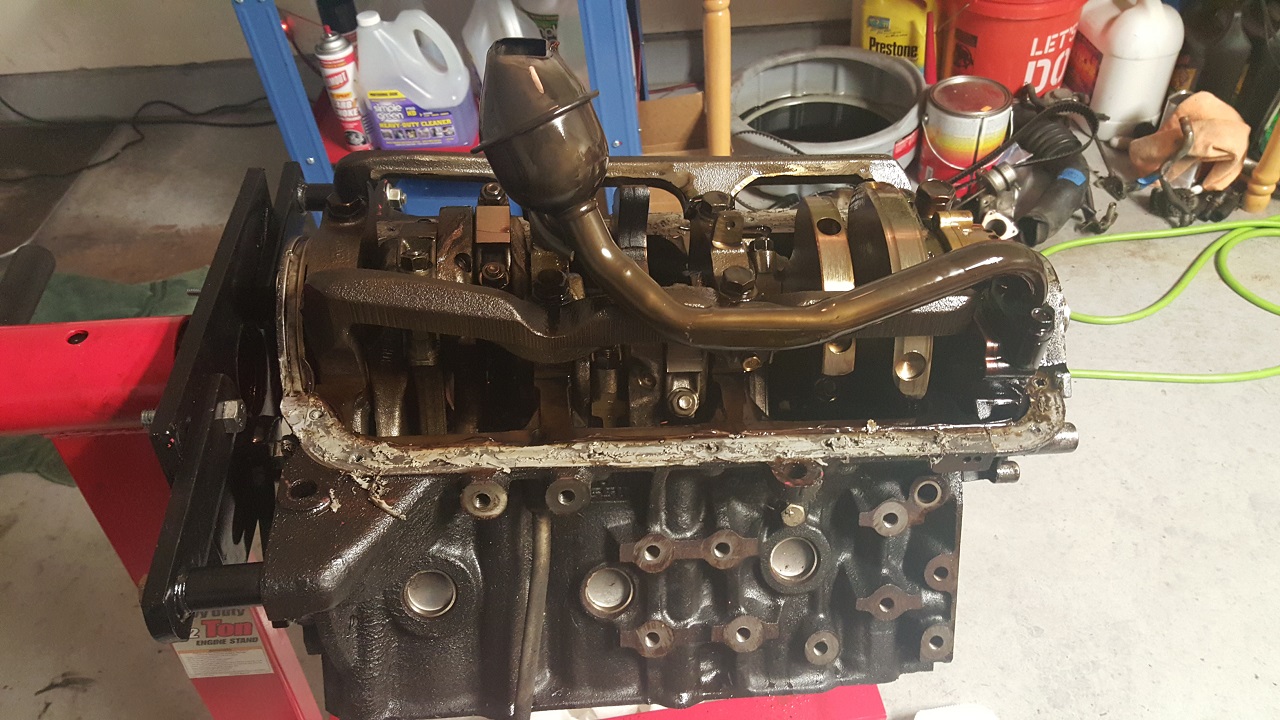
Here is a picture after the girdle was removed:
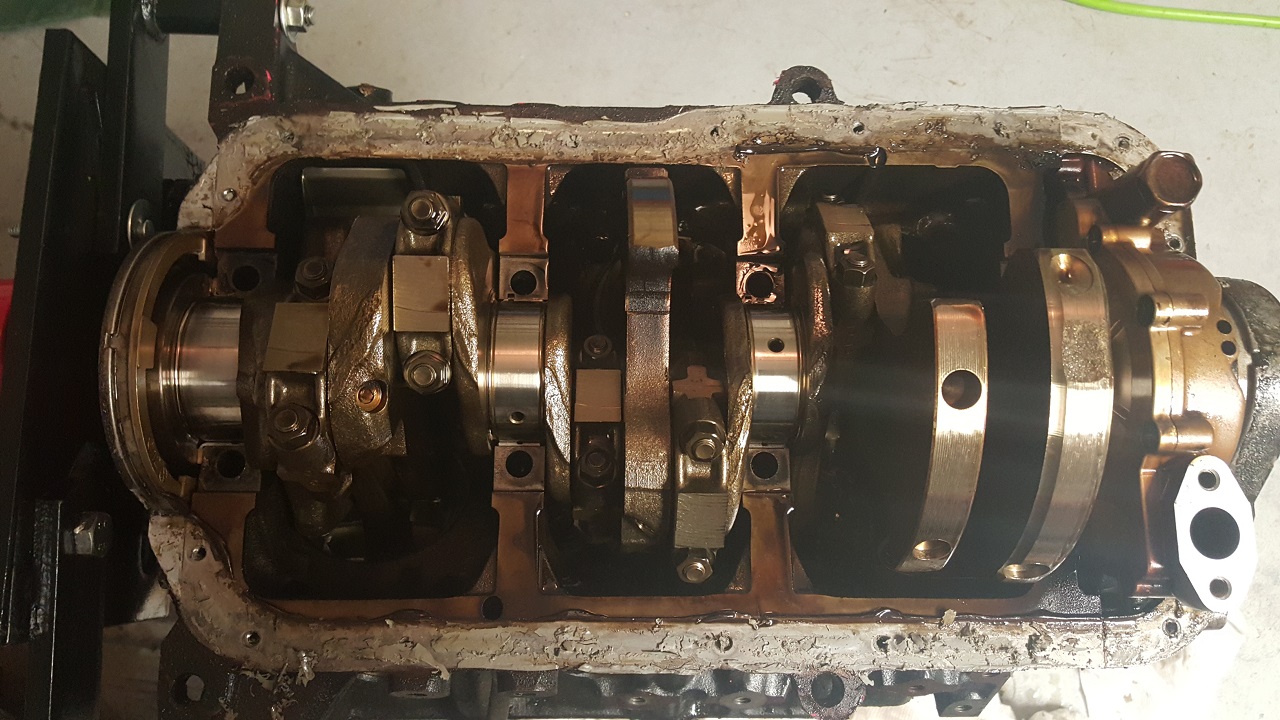
Here are the pistons and girdle. All look good, no obvious signs of damage or problems.
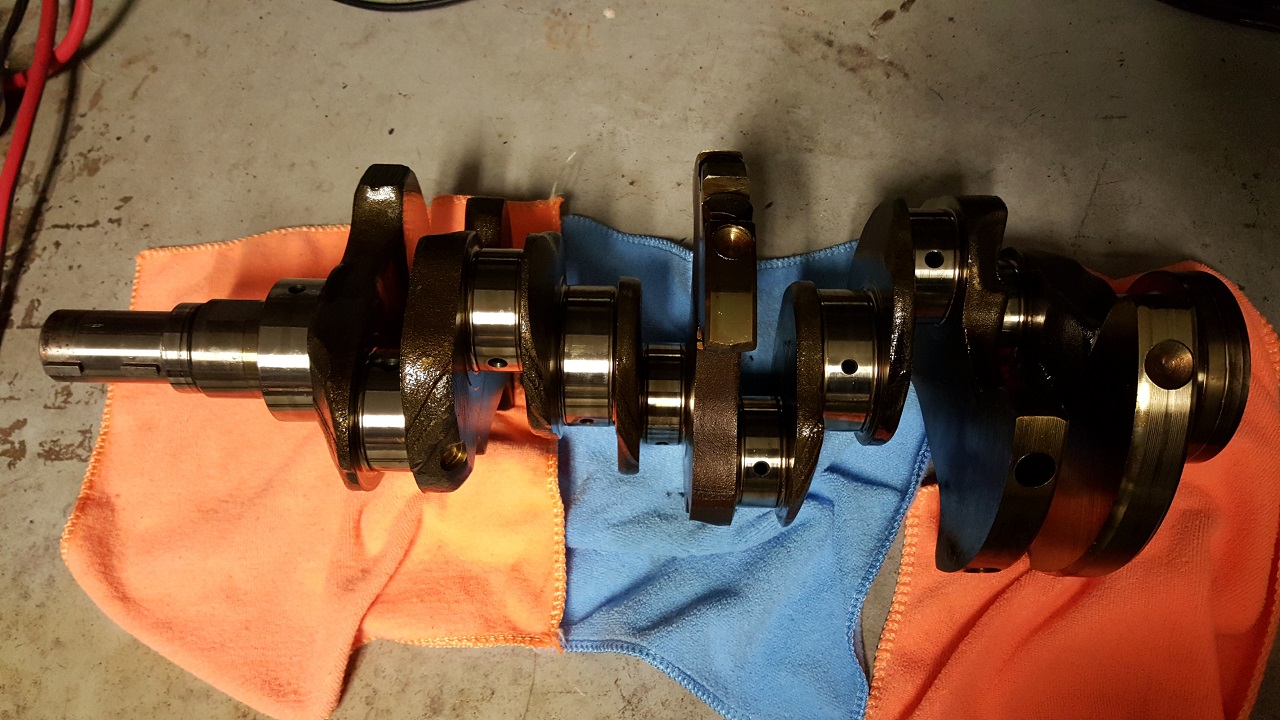
Here is the crankshaft. It looks really good.
Here's a picture of the engine block with bearings still in place.
